Current page: 5 (total of the book has 8 pages) [available passage for reading: 2 pages]
Chapter 18
Fourteen rare causes of stove smoke
1. During the simultaneous heating of three (or more) stoves in a large house and installing them at full thrust, all stoves begin to smoke and even die out, although their pipes may not be connected by horizontal wells to exit into one pipe. The cause of this may be the formation of a vacuum plug inside the house. Stoves begin to require a more active air supply for the process of complete combustion of fuel than the house can provide.
Elimination of the cause: to heat the furnace alternately.
2. In multi-apartment and two-story houses, where the outlet openings of chimneys and ventilation wells are made in the same masonry according to the principle of chimney batteries, this phenomenon may be present. When the furnace is heated, smoke from the outlet of one furnace, according to the principle of overturning the draft (see paragraph 1 of Chapter 4), begins to actively enter one of the neighboring smoke (or ventilation) openings and from there to the neighboring room.
Elimination of the cause: increase the height of one of the problematic holes by 1 or 1.5 m.
3. There is also a very rare, but unpleasant phenomenon, the fight against which presents very serious technological difficulties. When there is a heating stove and a high staircase in one room (for example, a bell tower in a temple), a chronic and constant airflow occurs along the staircase aisle leading to the top of the bell tower. In the furnace zone of the furnace, accordingly, rarefaction of air is formed, and in the zone of the chimney of the furnace - a chronic and constant movement of air flow from the street to the room. Since the cross section of the corridor leading upward is ten times greater than the cross section of the chimneys of the furnace, then at least three times higher than the bell tower, raise the chimney - there will be no sense. All smoke will still go into the room, not into the chimneys. Intensive heating of the air in the furnace tube can for some time establish the normal direction of traction, but this is not for long. Sooner or later, everything with inexorable constancy will be back to square one.
Elimination of the cause: sealing the corridor going up, or installing the stove in another room.
4. Some stoves have an exhaust hood and a well above the stove, which, for the sake of saving bricks, goes to the same main line with the smokestack of the stove. When you open such a very illiterate constructed "exhaust" system, the draft in the furnace drops sharply (due to depressurization of the outlet smoke well) and the furnace begins to smoke actively.
Elimination of the cause. It is impossible to use such an “exhaust” system during the furnace firing.
5. Too long horizontal burs in the attic (more than 3 m), as well as turns of the chimney flues at a right angle.
Elimination of the cause: remove or significantly reduce burs. Bring a straight pipe to a new location. If this is necessary, then if possible, round off straight turns.
6. The number of revolutions of the furnace is too high (more than five or seven wells).
Elimination of the cause: “Parallelize” the chimneys of the furnace by making additional holes between the blind partitions of the smoke channels (better than the first from the furnace outlet), turning two consecutive wells into one double parallel one (Fig. 14).
Fig. 14. Schemes of rational parallelization of two or more wells inside the furnace, side view
7. The number of turns of the smoke stream (at right angles) exceeds 12.
Elimination of the cause: same as in paragraph 6.
8. The stove in the "machine gun queue" mode begins to produce frequent smoke emissions into the living room. The reason for this phenomenon may be the not quite reasonable arrangement of the blower holes in the furnace furnace, which causes short-pulse air turbulence directly in the furnace itself (Fig. 15).

Fig. 15. The location of the lateral blowing holes: a) incorrect; b) right, front view
Elimination of the cause: cut through the new blower holes, and lay the upper ones.
Too many stoves with improperly located blow holes in the furnace may not produce frequent smoke emissions inside the living room. The reason for this "humble" behavior of improperly placed blowing openings of the furnace of the furnace is nothing but the unsatisfactory force of the total traction in the furnace! With all the ensuing negative consequences, of course. If in such a furnace equipped with a firebox with improperly located blow holes (see Fig. 15), an experienced furnace master “digs in” and establishes a normal (and therefore, necessarily double) supply of traction, the aforementioned furnace furnace will certainly start to “shoot”.
9. Cracks inside the hearth of the furnace, standing on a fireproof foundation, as well as cracks in the smoke channels, will certainly form air leaks inside the furnace - such a depressurization of the furnace’s internal heat line always significantly weakens the overall traction and can be a hidden cause of smoke.
Elimination of the cause: if necessary, it is necessary to open the floors and eliminate all detected air leaks.
10. Narrow outlet pipe.
Elimination of the cause: install a new pipe with a diameter of at least 16 cm.
11. Low pipe.
Elimination of the cause: temporarily raise the pipe height by 1.5–3 m. If this does not give a real tangible effect, it would be wise to look for the reason for the smoke of the furnace elsewhere.
The general technical standard for the height of the pipe for the normal functioning of the furnace is 5 m from the surface of the grate. But, as practice shows, if the furnace is folded correctly, then with a three-meter pipe height, the draft will be quite satisfactory
12. Too wide a pipe (with a diameter of more than 30 cm). The total heat of the furnace leaving the chimney, which is too large in diameter, will not be enough to organize active heat flow. Cold and warm air will mix and form counter-flows and swirls.
Elimination of the cause: reduce the diameter of the pipe to 25–16 cm.
13. Periodic smoke emissions into the living room due to gusts of wind on the street:
a) if the pipe relative to the ridge is at a distance (horizontal) of less than 1.5 m, then it is necessary to make the level of the pipe higher than the ridge by 0.5 m;
b) if the pipe is (horizontally) within 1.5–3 m to the ridge, it is necessary that its level is not lower than the ridge;
c) if the pipe is located at a distance of more than 3 meters from the ridge, measures must be taken to ensure that its level is 10 ° below the level of the ridge horizontally;
d) if the overturning of wind flows is caused by a tree standing nearby or by a wall of a tall house, then at the pipe outlet it is worthwhile to install a windproof visor of the appropriate shape.
14. During the summer, birds made a nest in the chimney.
Of course, there can be several reasons for smoke. However, each of them will need to be detected and eliminated - because without this it is impossible to achieve stable and even traction in all operating modes of the furnace.
Chapter 19
Furnace troubleshooting and repair
Minor repairs1. The closing of the formed cracks in the masonry:
a) the crack is deepened by 2-3 cm and cleared;
b) the cleaned place is wetted with water (and not in advance, but immediately at the very last moment before grouting) and a liquid stove solution is rubbed into it;
2. Replacing the hearth brick:
a) cracked and crumbling hearth bricks are removed;
b) “dry”, suitable bricks are selected and installed either on sand or on a liquid stove solution, depending on the initial technology of laying the hearth.
3. Replacing individual bricks:
a) the old kiln solution is completely removed from the joints of the problem brick along its entire perimeter;
b) "dry" is fitted with a new brick and installed in a pre-moistened nest on a liquid furnace solution.
4. Replacing the grate:
a) a new grille is installed with mandatory consideration of thermal clearances (0.5 cm);
b) usually it is placed without a stove solution; thermal gaps are covered with sand or ash;
c) it is important to take into account the correct location of the slopes (see Fig. 10, but) and the proper position of the grating (see Fig. 10, b) It is also necessary to take into account the correct proportions of the blower chamber described in paragraph 1 of chapter 25.
5. Relocation of the lining (without disassembling the walls of the furnace):
a) the plate is removed, the entire lining brick is removed;
b) everything is thoroughly cleaned of the old furnace solution and re-laid out taking into account the recommendations given in paragraph 19 of chapter 15.
6. Hog repair:
a) if necessary, provide additional lighting;
b) special attention should be paid to the presence of cracks and cracks in the lower part of the transition of the vertical well to the horizontal (Fig. 16);

Fig. 16. Layout of the most problematic place in the hog (essential for houses with wooden walls), sectional side view
c) in the presence of cracks larger than 1–1.5 cm, indicated in the problem location in Fig. 16, the entire hog knee is shifted again.
7. Replacing or reinforcing the furnace door frame:
a) old fasteners are removed;
b) if necessary, change the method of fastening in the furnace seams in the outer walls of the furnace, drill new through holes for wire fasteners, taking into account the recommendations given in Fig. eight, but and b (see paragraph 7 of chapter 15);
c) wire rods are inserted into the drilled holes with a margin. After the door is installed on the seat and its rigid fixation, the spare wire segments are laid in pre-cleaned seams with double rotation at right angles to a depth of about 2 cm;
d) between the masonry and the frame of the furnace door, a thermal clearance of 0.5 cm should be left, taking into account the recommendations given in chapter 17 (explanation to paragraph 4).
Medium Repair1. Replacing the furnace furnace:
a) one of the walls of the furnace furnace is removed;
b) a new wall is laid out instead of the removed one;
c) the second wall of the furnace is removed and a new one is laid out (all firebox bricks are replaced alternately around the perimeter).
2. Elimination of blockages in vertical chimneys:
a) the wall of the furnace is partially disassembled in the place where the internal partition is necessary;
b) the partition and the disassembled section of the wall are restored, then the following sections are disassembled, etc. All zones of the smoke channels are alternately viewed (or repaired).
3. Repair of a brick pipe outdoors:
a) all problem areas are removed and replaced one by one or the pipe is completely disassembled and repositioned;
b) the pipe is laid out on the stove solution, and when leaving the roof territory - on the cement.
Overhaul1. Complete replacement of the bottom of the heating furnace:
a) two walls are disassembled, the lining is removed;
b) the lining is restored without dressing with the main masonry of the furnace;
c) the outer walls are restored with careful preparation of the furnace seat.
2. Complete disassembly and shifting of the furnace if the hearth of a classic Russian furnace has gone into custody.
3. Change in volumes and directions of chimneys.
4. Complete replacement of one or more furnace walls.
1. Furnaces of I. S. Podgorodnikov.
2. Ovens discussed in chapter 21.
3. The heating furnace, a diagram of which is shown in Fig. 17.

Fig. 17. Diagram of one of the most technically thought-out furnaces of the century before last
This furnace can be easily converted into a cooking furnace if the furnace is placed in the side of the furnace, accordingly equipped with a stove, and the bottom of the smoke channels is lowered to the floor level.
A feature of this furnace, developed, obviously, by V. A. Stroganov, is the presence of:
a) afterburners;
b) technically competent distribution of the direction and location of the channels, allowing to achieve uniform heating of the entire area of \u200b\u200bthe smoke wells of the furnace;
c) a calibrated hole suction direct thrust;
d) just one cleaning door, which makes it easy and simple to clean all the wells; if necessary, through it you can get rid of tipping traction in the furnace;
e) furnace grates and hearths, which are arranged under well-thought-out inclinations that contribute to more efficient combustion of fuel residues than in stoves with a strictly horizontal arrangement of the grate and furnace hearth.
The furnace with this arrangement of chimneys will be uniformly heated throughout its heat transfer area. Traction in such furnaces is always good.
4. A heating furnace with horizontal chimneys (Fig. 18) is good because it does not require strict and clear fixed markings for the exit of the chimney. In pre-revolutionary times, only the senior furnace master could make such markup. Laying the foundation and laying the first row has never been trusted by apprentices. And not because it was a “matter of honor." The reason for such a strict subordination was by no means a formality, but namely the possibility of a fatal mistake.
Fig. 18. The furnace of Sergei Mikhailov. The location of all technological units of the furnace is given taking into account all the laws and recommendations given in this book
The fact is that the senior furnace master had to “keep in mind” the whole furnace. He “saw” all the higher floors, directions, the number of future chimneys, etc. All this is true now, but not in relation to furnaces with a horizontal arrangement of smoke channels. Such a furnace (Fig. 18) does not require any special design skills, because all the technological difficulties in the chimney “linking” of the furnace dimensions move from a horizontal plane to a vertical one.
Furnaces with horizontal wells were undeservedly forgotten. The reason for oblivion is either ignorance or ignoring the laws described by me in chapters 28 and 29 of this book. There is an opinion that stoves with horizontal wells are supposedly quickly clogged with ash, they are more difficult to clean, etc. This is absolutely wrong. You can get rid of these completely unfounded prejudices by looking in more detail at the above chapters.
Now I will confine myself to a brief listing of the main advantages of a horizontal well furnace:
a) does not require accurate calculation when marking the first row;
b) evenly warms up (the hottest parts of the furnace, allowing intensive heat removal, are located below, while the less hot parts gradually move to the upper zone of the heated room);
c) it cools evenly (heat from the lower rows of the furnace is gradually transferred to the upper rows. And since the period of intense heat transfer and cooling of the furnace is the same period, measured over several hours, this is another plus of the furnace with horizontally located smoke channels);
d) allows for completely seamless installation of arched dryers into the furnace masonry (Fig. 19).

Fig. 19. The furnace of Sergei Mikhailov with a built-in niche-dryer, side section (the proportions of the combustion chamber are shown in Fig. 18)
If the customer completely relied on my choice, I always preferred a furnace with horizontal wells. “Complaints” about this type of stoves were surprisingly uniform: for any excess log thrown into a burning firebox, one had to pay with unbearable heat in the house.
5. Smoke wells, a diagram of which is presented in Fig. 20, can be useful when laying a heating stove, taking into account the "summer option".

Fig. 20. Well pattern: summer and winter options, side section
6. A furnace, horizontal sections of which are shown in Fig. 21, allowed the author of this book to heat it once a day, even with the onset of protracted 37-degree frosts. At the same time, the room temperature never dropped below + 19 °.

The features of this furnace circuit are as follows:
a) eight short horizontal wells;
b) the maximum heat transfer area in the lower part of the furnace (it is recommended to lay the furnace on a trench hearth, see Fig. 11, as well as paragraph 11 of Chapter 15);
c) significant heat capacity;
d) additional valve with a “summer option”;
e) horizontal remote “sunbed”, on which it is convenient to dry wet shoes, clothes, etc.
7. The trench heating stove (Fig. 22) has one (in my opinion, insignificant) drawback: it has no grate.

Deaf under (lack of grate) in cooking and heating stoves in Soviet times was even banned by a special directive! The reason for the ban was "unsatisfactory combustion of fuel in such a firebox, firewood and especially coal, peat and briquettes." The All-Union Generalissimo for Furnace Construction, to put it mildly, went too far in this matter. But when coal, peat and briquettes are used as fuel, it is really impossible to do without a grate in the furnace.
A feature of this type of furnace is:
a) the presence of a remote (high) "deckchair";
b) the absence of a stove door, which tells the stove many of the advantages of a fireplace with its high efficiency;
c) very good heating of the lowest layers of air in a living room. But this is very important when there are small children in the house - as you know, most of the time they spend on the floor.
I note that in this oven bread is baked well and evenly.
I also had to heat the indicated furnace only once a day, even during the most severe and prolonged frosts.
Many authors of books about the stove business that I respect have expressed serious doubts that the stove, when the furnace door is open, will keep the house warm. Indeed, at the same time, the internal walls of the chimneys are cooled by air that is not involved in the chemical processes of complete combustion of fuel.
All this is fair. But not for the type of furnace shown in fig. 22. After all, she, as mentioned above, generally does not have a stove door. Why is that? Briefly explain:
a) the inlet area was, of course, not chimney, it had a height of 25 cm and a width of 30 cm. Even the smallest increase in these sizes would necessarily lead to a weakening of the overall draft of the furnace and even to the fact that it would start to smoke;
b) there were no grates in the furnace;
c) a high firebox, obviously, significantly slowed down the speed of movement of air masses, and the air slowly passing through the firebox had time to thoroughly warm up. A characteristic feature of this furnace was that after three years of its intensive operation, I could not scrape up even half a liter of ash residues at the entrance to the first horizontal rise (where the most ash usually accumulates).
8. In fig. 23 shows a diagram of a Dutch cooking and heating dutch.

Actually, cooking Dutch heating simply does not happen. The Dutch is a heating stove without a stove, the wells of which are located above the firebox. But the popular opinion was that the furnace, the wells of which are above the furnace, is Dutch. And in the hinterland for the Dutch they generally take any stove, at least slightly different from the classical Russian.
This oven is convenient in a space-limited room. Its characteristic features are:
a) a vertical pillar at the rear of the furnace, designed to support the stove;
b) trenches, which very significantly increases the area of \u200b\u200bintensive heat removal;
c) horizontal wells, the merits of which were mentioned in paragraph 4 of this chapter;
d) significant (almost maximum) heat capacity intended for furnaces of average power of a periodic furnace.
It is indisputable that furnaces designed for permanent heating can have a large heat capacity. But it must be borne in mind that the combustion processes in continuous furnaces, and even more so in furnaces designed for solid and liquid fuels, as well as the principles of constructing a furnace and furnace chambers (continuous operation) will significantly differ from the principles recommended for batch furnaces (1, 5–2 hours of heating every morning and evening)
Briefly about the differences between batch and continuous furnaces, the following can be said. In a periodic furnace, after 0.5–1 hours, the inner surface of the walls can heat up to 800–900 ° C. Hence the inevitable appearance of cracks and gaps in the furnace joints in the first year of operation of batch furnaces. With continuous combustion, fuel consumption is sharply reduced (in relation to coal, gas and liquid fuel) and the temperature of the heating of the walls decreases to 450–500 ° C. Therefore, the burners of batch ovens are usually lined with refractory bricks (the temperature limit of high-quality red bricks usually reaches only 700–750 ° C), and the burners of continuous furnaces do not need this (excluding the use of anthracite).
9. In fig. 24 is a diagram of a summer kitchen stove.

Fig. 24. The simplest kitchen stove
Its characteristic features are as follows:
a) a very low firebox height - only 21 cm (if someone does not like this size, the height of the firebox can be raised, but in this case, firewood will need two to three times more for cooking).
It is best to use an old picket fence and unnecessary lumber residues as firewood in a furnace with a similar furnace height. Two or three old shtaketin will be enough to prepare a full dinner in the summer for a family of six. However, in our time, when most rural residents use gas or electricity for cooking, a stove of this height is unlikely to find its mass user;
b) the presence of a sparking tooth and the absence of all that is superfluous.
An example of a heating - cooking stove device. Such stoves are successfully used in the Danube East in the construction of individual residential buildings. If the house is small (up to 60 m2), then only the stove is enough to heat it, if more, then they arrange water heating, the boiler of which is mounted in the stove. We’ll immediately clarify how to say: lay or lay down the stove? It would seem that the laying of the word and lay the stove. However, I adhere to the fact that it’s more correct to say go to bed and that’s why.
The figure shows the parts of the brick: 1. bonded face; 2. top bed; 3. ribs (whiskers); 4. spoon face.

And laying in half a brick, and usually laying the stove, is called laying with a spoon .. And we lay the brick on top of each other, which is more combined with the word to lay, lay, but not put in any way.
The very name of our stove (heating - cooking) says that it will have a hearth (a firebox with a stove for cooking) and a heating shield (heater). And the third mandatory part will be the pipe. In this case, mounted, because it is mounted directly on the furnace, it is mounted on it. There are also radical or remote ones that are separated from the furnace and connected to the furnace by a horizontal “sunbed” or “hog”. The location of the heater may be different, but during the construction of a house where water heating is not planned, it is advisable to arrange the furnace so that some part of the heater goes into each room. See the photo below.
For waterproofing on the foundation (guardian), lay out the base of the future furnace. The sides of the furnace are correlated with internal walls and partitions. The base is laid out in two rows. It will be common for both the furnace and the heater. On the third row we form chimneys and a furnace. Why are these two parts of the furnace not interconnected? Because for the long life of the furnace you have to shift the furnace 2-3 times. The size of the furnace, in addition to see, is also measured in bricks. The size of our furnace is 4x5 bricks. Indent from wooden structures to brick. They (indents) are also called the "cold quarter". The length of the brick is 25 cm, and this is the fourth part of the meter.
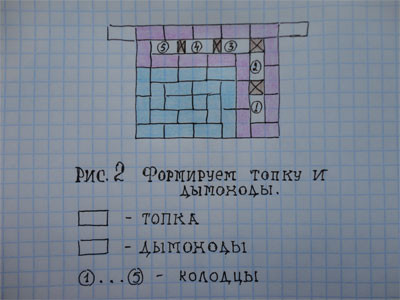
Now a little about how to navigate the location of the wells. As can be seen from the drawing, the furnace heater has a long and short side. When installing a nozzle pipe (as in our case), a ceiling cut is formed (fluff). When the size of the chimneys in a brick (12x25 cm.), Its size should be 90x100 cm. The central place for the device of the furnace, as usual, coincides with the presence in it of a capital wall on which the ceiling beams lie. When installing a furnace cutting, it is impossible to cut it, for obvious reasons. And if the output well goes exactly there? What to do? You just need to provide for this when installing chimneys and move the chimneys with a horizontal well ("deckchair", "hog") so that the last well falls into the place where you can make a cut without problems. You can translate both the upper and lower "hog". Which is better? I always do the bottom. Why? The lower hog begins immediately after the furnace and the air there is the hottest. It runs along the bottom of the entire heater and heats it more strongly. Heat, as I said, rises up the heater, providing uniform heating. For the same reason, I prefer horizontal wells. But they, I think, are appropriate to do with a small length of the heater. The translation of wells is very important to understand, then you will not be like "zombies" tied to orders and drawings. Remember that there are no identical ovens. Learn to think, understand where to send smoke, so that it is easier to move. In the figure, the wells are divided by partitions. This I showed how to divide the heater into chimneys so that they are of the same section. But to begin to lay them down from the foundation is not necessary. Look at fig. 3 and imagine the movement of smoke.

The rising and falling wells are connected by “passes” or “dives”. Top and bottom. If the upper “diving” can be a section into the chimney, then the lower one needs to be done 1.5 times more. Why? Yes, because small (unburned) smoke particles (soot) are heavier than air and will fall down, accumulate and gradually narrow the lumen of the lower "diving", which will lead to a deterioration in stove draft. In fig. Figure 4 shows how the output well can be translated by means of a lower hog device.

When you divide the heater into chimneys and try to make them the same (which is important), different thicknesses of the partitions can turn out. A quarter or half a brick. This is not scary. If with the device of partitions that begin from below everything is clear (they rest on the base), then with the device of partitions above the lower diving it is more difficult. They need to create a support. The support should be a brick released from the masonry of the heater, and then, a partition is already arranged on it. By this principle, the entire heater is laid out. Chimney overlap is made in two rows of brick inlet on one side and on the other. Fire protection dimensions must also be maintained above the heater ceiling to wooden structures. In the heater, the clearance of the outlet well is visible from above. Here the furnace valve will be installed and the pipe will start.
We select a furnace valve so that it as much as possible matches the cross section of the chimney. Cast iron valves are better than alloy valves.
Ceiling cutting, from experience I know, the most time-consuming part of the furnace. Work requires accuracy so that the edges of the puffs are the same, even and horizontal. The difficulty is that all this is done from above. While you have little experience and in order to achieve this, you will have to go downstairs more often and control the work, or let someone tell you. How I determine when to start making “teeth” on a butcher. When the distance to the bottom of the ceiling from the edge of the folded pipe remains in a brick. Then the fifth "inlet" will be flush with the ceiling. Above the fifth row, you must complete the formation of the cut. Its size will be 3.5x4 bricks or 90x100 cm. The upper edge of the groove should be laid out above the ceiling beams on 2 rows of bricks, plastered with cement mortar, as, indeed, the whole pipe.

After completing the cutting device, lay out the pipe riser. The riser passes through the roof and then forms the so-called otter, which hangs 100 mm above the roof. on all four sides. This overhang provides drainage of atmospheric water to the roof. If this is not done, then the water will drain down the riser, destroying it and moistening the attic space. Next are the head and head of the pipe. The cap is crowned with a cap, which prevents precipitation from entering the pipe and improves stove draft.
We have not yet considered the necessary element of a cooking stove - a firebox with a stove. I deliberately combined the explanation for the design of the furnace with the materials for the sheathing of the furnace tin. I hope that from these photos you will understand the firebox device and how to sheathe the stove. I assure you that if you do everything carefully, your stove will have a very attractive look and it will cost you quite inexpensively.

We spread the firebox. Immediately prepare the walls for the skin. We pay special attention to the protruding corner of the furnace. It should be vertical. The furnace and underfloor doors must recede from the masonry so that tin can be launched behind their “shoulder”. In addition, the edges of the doors should be in the same vertical line.

We mark and cook the tin under the stove. To do this, put a slightly larger sheet of tin on the stove, as shown in the photo. Mark the same distance from the walls of the heater and mark on the sheet. The future "shoulder" will be 2.5-3 cm. We cut out a corner of tin at the crosshairs of the lines and bend the "shoulders" at a right angle. We lay the blank on the stove. Curved edges should fit snugly against the walls of the heater.

Now we need to give marks on the slab corners on the lower surface of our workpiece. After that, we lay the inverted workpiece on the bars and lay the plate on the workpiece with the smooth side (the side on which it is boiled) so that the corners of the plate coincide with our marks. Draw a plate around. Next, remove the plate and step back inward from the lines by 3-3.5 cm. Draw additional lines and cut out the resulting rectangle.
Now we transfer the upper point of the laying of the furnace to the outer surface of the skin and mark the level of the bend of the sheet by level. We bend the tin with pliers, after cutting the tin along the edges of the heater and make a lock around the edge.

Then it remains to cut and nail the upper girdle. Size it is chosen arbitrarily. Whoever likes it. It is also formed in two parts and docked at the corner of the heater. Here, perhaps, is the entire course of the skin. I think that everyone can do such a job. The main marking accuracy and accuracy. On the floor, tin is pressed against baseboards. And a little secret, or rather advice. Before nailing the tin, mark the seams on some slat or fasten the tin with screws with wide caps, pre-drilling holes with a drill into the brick body.

After covering, “grind” the stove with cement mortar, whiten it, wipe it with oil, beat the baseboard and the flooded sheet, and the stove will take on the form as in the first picture. Try it and it will work out.
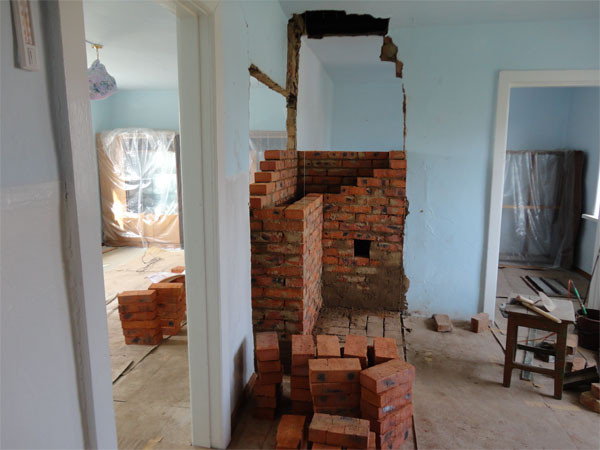
A wood stove in a house, especially if it is the only source of heating in it, deserves a place of honor and regular care. If the furnace was once built by an experienced stove-maker, then it will serve as much as the house will stand. It is only necessary from time to time to clean the pipe and chimney, open and clean the so-called wells (smoke passages in the cavity of the furnace itself), repair the furnace, stove and the furnace itself, grease and paint. All these measures, carried out in a timely manner, will relieve household members of unforeseen situations in the form of lack of draft in the chimney, destruction of the pipe and chimney in cold periods of time.
How to clean the chimney and pipe from soot?
A priori, that during the operation of the furnace, soot accumulates on the walls of its chimney and pipe. If the stove is heated by wood, then this happens more slowly, and if heated by coal or coal briquettes, then the opening of the chimney quite quickly grows with soot. This leads not only to the fact that the stove simply stops heating: the wood in the firebox does not light up, and if it does light up, then the smoke goes into the room, but it is fraught with more dangerous consequences. The soot in the chimney can catch fire and then an explosion can occur from the generated high pressure and high temperature in the chimney. The best thing is that it can all end: the explosion will go up and the outer pipe will collapse. But there are such cases that the furnace itself is destroyed by the force of the explosion and here the consequences can be very serious.
The repair and preparation of the stove for the heating season should be started by cleaning the chimney because these are the dirtiest jobs in which soot falls on the stove and dust can stain the paint that has just been done.
How to determine if chimney cleaning is required
Chimney cleaning may not be required for a long time, if the stove is heated only with dry birch, alder or aspen wood. Dry wood is considered to have been lying under a canopy for at least 1.5 years. Spruce, pine or larch firewood pollutes the chimney with soot much faster, not to mention coal. In addition, the rapid accumulation of soot occurs if the owners burn synthetic waste in the stove.
The very first sign of chimney clogging is poor draft in the furnace, i.e. if they do not light up well, even dry firewood slowly burns out. In this case, the owner should leave the house and see what color smoke comes out of the chimney. If, when using good dry wood, the smoke from the stove is dark, then this is a signal that the chimney needs to be cleaned. The color of the flame from the firewood burning in the stove with a clean chimney is light orange, while burning wood emits a characteristic light crackle and a slight noise. If the color of the flame is much darker than the orange color, and the wood is barely burning, then this also indicates that the chimney is clogged with soot.
To more accurately determine that immediate cleaning is required, half or the whole brick tied with a rope will help. It is enough to lower it into the pipe: if the brick passes freely to a depth of 1.5 - 2 meters, then it is not soot and you need to look for another reason for poor traction. If the brick does not pass or passes with difficulty, you need to immediately clean the chimney.
In order for this not to come as a surprise during the winter cold, brick diagnostics must be carried out in the summer.
Chimney cleaning
Before starting work, it is necessary to open the gates of the fireplace and the Russian stove, and close the hole under them above the stove as carefully as possible. It is good to shut the firebox and blew.
They clean the pipes with a large brush (metal or hard plastic), to which I fasten the load. The whole structure is tied with a rope and up and down movements ensure that the soot falls down onto the plate. After that, the flaps are opened several times so that the soot residues from impacts fall down; then they remove the soot from the stove, clean the Russian stove, furnace and blower.
Prevention of excessive soot formation
The simplest method for preventing the deposition of soot in a chimney is to burn potato peelings in a firebox with firewood. Cleaning is best pre-dried or at least get wet with a newspaper.
Cleaning wells (chimneys in the cavity of the furnace)
Usually, the owners know where the wells are located by their marks, but if you first encountered the need to clean the wells, and you need to clean them at least 1 time in 3 years, then you will have to look for them. As a rule, they are placed on 3 sides of the furnace, except for the one where the plate is mounted. Carefully look at the surface of the furnace, where the entrance to the well is located, the brick (usually half) lies with an edge and there is a void under it. Take a trowel or putty knife and tapping the stove to identify voids.
Then remove the plaster and take out half of the brick, which is the door to the well. Light gray ash is deposited in the wells, which must be removed with a scoop or a deep scapula. Wells can go to a rather great depth and in different directions, so a fairly large amount of ash accumulates in them. Ashes from wells do not need to be thrown away, it is an excellent top dressing for the garden.
After the wells are cleaned, they must be closed again with a brick and covered with a quick-hardening mixture. Ideally, it should be clay diluted with water and lime, but any quick-setting plaster is also suitable.
Through clean wells, smoke passes unhindered into the chimney, and the wood burns out in the prescribed amount of time, effectively heating the bricks. Thus, the owner can close the pipe on time, while eliminating heat loss.
Repair of firebox, stove
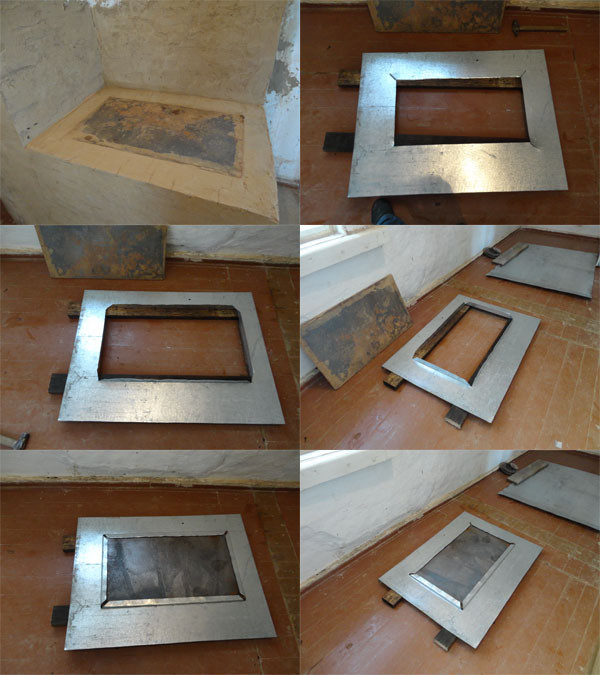
In the furnace, the metal grill may be damaged, it must be replaced, otherwise unburnt logs will fall into the blower. The furnace door often loses its tightness from high temperatures and pretends to be poor. You can try to adjust it, if this fails, then the door will have to be changed.
Sometimes the surface of the plate cracks, it also needs to be replaced with a new one. Before buying a stove or grill, you need to measure them in order to know the desired size. Having mounted a new hob, it is necessary to cover all the holes with a mixture that is resistant to high temperatures. In those cases where bricks are damaged somewhere, they must also be replaced.
Plastering and painting the oven
Before plastering the furnace, it is necessary to clean its surface from old paint and plaster, which does not adhere well. To do this, you need to boldly act with a trowel or putty knife, showering everything that does not hang securely on the walls of the stove. The resulting dust must be brushed off with a broom or a large brush dipped in water.
Then you need to plaster the formed potholes. This can be done with a spatula and trowel or trowel. If possible, it is best to use natural clay. Dry mixes, of course, dilute and apply much easier, but clay is the most environmentally friendly. The plaster is applied to a surface previously moistened with water, since water provides better adhesion.
After the plastered places dry out, they need to be whitened or painted over with the paint that you are going to apply to the entire surface. After the whitened places dry out, you can start painting the entire furnace.
As a rule, furnace repairs are combined with whitewashing of the whole house, so work must be carried out comprehensively, but, first of all, clean the chimney and wells.
In the last turn, the most dirty places of the furnace are painted: near the furnace, blower and above the hob.
All furnace repair work is carried out in the warm season, the furnace must be cold. If you whitewash the hot surface of the oven, it will quickly crack and crumble.
Too large a layer of paint or lime also provokes shedding of the upper layer, therefore it is recommended that at least partially remove the upper layers of paint (whitewash).
In your home, it is preferable to use quicklime for whitewashing, this is a kind of disinfection of surfaces and the prevention of the formation of fungus and mold.
Why heat a stove in the summer?
In order to keep the house in good condition, it is necessary to heat the stove regularly. In addition, it supports its performance. Even in the summer it is recommended to periodically heat the furnace, this should be done 2-3 times a month. It is enough to burn a very small amount of thin firewood, wood chips in the furnace, you can leave the dampers not shut so that there is additional ventilation of the room.
- Where to start?
- The main work with the foundation
- Workout order
There is no such person in the world who would not like freedom, but in order to have it, one must almost always work well in advance. Private life makes you learn many things, and the layout of a brick oven for a home will not be the most difficult, but will remain very interesting in the future.
Where to start?
Tools and materials:
- roulette;
- hammer drill;
- shovel;
- sand;
- water.
At the very beginning, you need to make a choice which kind of stove will stand in the house, because there are a great many of them: stoves for saunas, stoves (barbecues), fireplaces, babies, heating and cooking-heating (HOP). Of all the most popular are VOPs, because with high-quality assembly they perform their functions to the maximum.

In the 21st century, several basic options stand out, and it is the Swede Buslaeva who enjoys the greatest popularity because of the simplicity of the work process and the final results (heats 70 m² without complications). Also, if desired, it can be used as a furnace for a bath, because a heater can easily be made from the cooking compartment.
After making a choice, you need to start the preparatory work. To begin with, a place for construction is formed (100x110), but it should be located at a distance of 15 cm from the nearest wall or end-to-end with an interior partition. The site is marked in advance in any convenient way (chalk, coal), so that further activities are successful.
If the floor is already flooded, you will have to carefully break it in the right place. This must be done in such a way as not to damage the main structure. To do this, use a hammer drill with a diamond drill, which makes holes in a circle. Then they are just as carefully knocked off with a chisel. The plate is usually lifted and carried out by hand, but if desired, it can be split into several parts and removed in parts.
Then a hole is dug 40 cm deep. This depth will not only withstand the mass of the entire brick structure, but also withstand any influences from below. The bottom is covered with sand and watered. After this, you need to have time to finish the preparatory work in 2 days, and there is no sense in completing them earlier.
Back to the table of contents
The main work with the foundation
Formwork in this case is not required, which greatly simplifies the work.

But the reinforcing cage should be perfect. This will require:
- rod 10 mm;
- bulgarian;
- roulette;
- welding machine;
- broken brick;
- concrete mortar.
The main difficulty is the observance of external dimensions, since they should not reach the walls of 2.5-5 cm on each side, be 3-5 cm above the sand level and not reach 8 cm to the floor. The distance from the walls and sand is determined by the distance from moisture, and on top you need to make a little play so that the future furnace warms up the entire room without cold layers.
To begin with, 10 parallel rods are laid in increments of 10 cm, and another 11 are laid perpendicularly on them. All joints are fixed by welding. The result is a fairly massive grid without protruding edges.

Immediately you need to make another 1 completely identical, so that even the joints match up to a millimeter. To combine them, you will have to use similar rods of 25 cm, which are laid between all joints. It turns out a very heavy lattice, so in the absence of a winch, you need to finish welding already in the pit.
Under the reinforcement, you need to lay broken brick to slightly raise the metal above the level of sand. Such a design will no longer rot from moisture and will not collapse with time. It remains only to fill the concrete solution 1 cm above the level of the brick and leave it for 3 weeks for complete solidification. After 2 weeks you can move around the surface of the concrete, but it can still be deformed under a stable load. Therefore, you need to wait the whole period, even if the manufacture of a furnace for a bath is in progress.
Back to the table of contents
Workout order

Figure 1. Drawing of the masonry of the bath furnace (example 1).
Tools and materials:
- level;
- waterproofing;
- foil;
- the brick is solid;
- refractory brick;
- clay solution;
- sheet steel;
- steel strip;
- grate;
- hob;
- oven;
- the door.
Regardless of whether the furnace for a bathhouse or a house is being manufactured, the foundation must be covered with waterproofing.

Figure 2. Drawing of the masonry of the bath furnace (example 2).
For this, it is better to use penetrating options based on bitumen, but you can also use the usual roofing material (it is most often used because of the price).
The foil is laid up on the waterproofing upward with a reflector so that the heat does not go into the floor, but is dispersed throughout the room.
It is optimal to lay the foil at that moment, while the waterproofing has not yet set. Due to this, the fixation will be extreme.
Now you need to take the drawings (Fig. 1, 2 and 3), after which you can begin to equip the ideal furnace for the bathhouse and home:

Figure 3. Drawing of the masonry of the bath furnace (example 3).
- Rows 1 and 2 are for alignment purposes only. Each brick is laid with a level.
- After the end of level 2, the site should be perfectly flat so that further construction is not limited by anything.
- 3 cleaning channels and a blower are formed. Moreover, one of the channels simultaneously serves to create traction in the system. There is a through channel at the back, but in the center it should be blocked 1 \\ 4 bricks.
- The back wall is removed, and a tooth made of refractory brick stands out in the right channel.
- Over the blower, the stroke decreases, in addition, the transition to the furnace compartment is carried out by refractory bricks. The entire perimeter is overlapped. At the same stage, a partition of 1 \\ 4 bricks is again installed.
- A furnace window is formed above the blower, and grates are placed in the hole. If you want to fix them, then you can use a clay solution. The vertical channel behind the furnace is divided in half using 1 \\ 4 bricks.
- The masonry remains unchanged, but an oven 45x25x29 cm is installed on the side of the furnace.
- A refractory brick is laid out behind the oven, with the help of which a vertical channel is fenced behind. The rest of the masonry remains unchanged.
- The masonry is repeated.
- There is no longer an oven on this row, so you can close the perimeter. As a result, there are 3 vertical wells in the back and one large compartment in the front.
- A hob is installed on the front side. Burners on it are optional, so you can use any model you like. On the front side, the masonry narrows to 1 \\ 4 bricks.
- The front side opens.
- These designs remain unchanged.
- Steel strips are laid throughout the area.
- An overlap is formed over the cooking compartment. On the left, in the far corner, there is an exit for steam and smoke.
- The masonry is repeated.
- A small dryer opens above the cooking compartment on the left and a large dryer on the right.
- The masonry is repeated.
- A small dryer is laid with a steel sheet, so it is divided into 2 levels to improve the quality of work.
- Masonry saved. The central and right wells are combined.
- Left wells are combined.
- The masonry is repeated.
- Steel strips are laid over the dryers.
- The masonry is blocked by a steel sheet so that in the end there is only one well that will go out.
- Masonry over the entire area except the abandoned well.
- Reducing the area to the perimeter of the pipe.
- Trumpet.